Showing posts with label recipe. Show all posts

Tuesday, March 22, 2011

Yummy Strawberry Syrup

So...

The kids are having a hard time with the homemade yogurt.

They won't eat it anymore.

...But I LOVE it! I am saving so much $$ making it, but it's not worth it if the kids won't eat it, right?

I have discovered a Strawberry Syrup Recipe from Our Best Bites (which is an amazing blog and now cookbook, by the way!)

The Strawberry Syrup is AWESOME in the yogurt. And...mix it with granola?!? Shut the front door! It makes my mouth water!

:)

And...it's SO easy!

Strawberry Syrup

1 pint of strawberries (green cut out)
1/3 cup white sugar
Splash of Lemon Juice (I used the bottled kind)


1. Simmer your strawberries (you don't have to add any water) until they get a little soft and strawberry juice is created.


2. Dump the strawberries in a blender/cuisinart.
3. Add sugar and lemon juice.
4. Blend until your desired texture is achieved. I made mine into a puree this time around.
5. Eat your weight in whatever it is you use this on!


Some ideas for this sauce:

Homemade Yogurt
Waffles
Ice Cream
Strawberry Shortcake
Smoothies
Cheesecake
Just swim in the glorious goodness...

Enjoy! And, let me know what you think!

Monday, March 14, 2011

Making Homemade Yogurt Thicker -- The Easy Way

All right, since I finally figured out to make yogurt, I thought I would try my hand at making it "thicker" this go round.

(Here's a link to the original yogurt post (with ingredients): Crock Pot Yogurt
I bought some cheesecloth. I poured the yogurt through it...I failed.
...Miserably...

I was frustrated.

I found coffee filters!

I layered three in a colander and then put the colander in a bowl.


Then I put it all in the refrigerator and let it sit for about 1 hour.

It worked! It's thicker!

The longer you let it sit, the thicker it will get. You can even make Greek-style yogurt this way.

And...the "liquid" you have left over is whey.


You can use it in place of buttermilk for recipies, I'm told. (I don't really use buttermilk a lot, though).

So, there you have it! Thicker, yummier, cheaper, yogurt!

Aren't you proud of yourself?

:)

Monday, February 28, 2011

Making my Own Yogurt - Try #3

Tonight, I am going to try to make my own crock pot yogurt.

Again.

For the third time.

If I fail (again), I am officially a yogurt flunkie.

This recipe has been floating around the internet for eons. I'm going to tweak it a bit, to try and get the desired effects...yogurt, not just smelly milk.

What you need:

1/2 gallon of whole milk
6 oz yogurt with LIVE cultures
Crockpot


1. Pour the milk into the crockpot (slow cooker).

2. Cook on LOW for 2 1/2 hours.


3. Turn off slow cooker.

4. Let milk sit until it is 110 degrees F. (About 2 - 2 1/2 hours).

5. Whisk in 6 oz. yogurt.


6. Wrap in thick towels/Down vest I had lying around.


7. Leave overnight. (About 6 hours).


8. Jump up and down, screaming like a loon because
It worked!!!

:)

It's gonna be a good Monday, ya'll!


Thursday, February 24, 2011

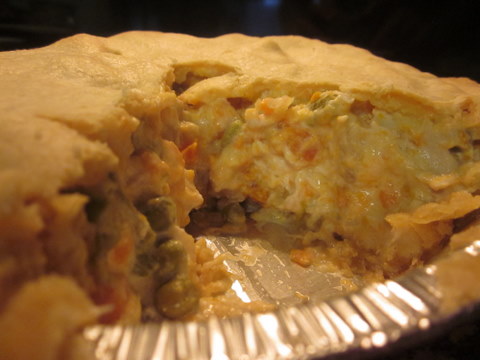
Chicken Pot Pie - In Under an Hour!

 The funk has been going around our house this week. That makes for crying, whiny Littlests, a bored Little Miss and an unhappy Mama...who still has to cook a healthy dinner. So, I adapted a recipe I had and came up with:

Chicken Pot Pie
(the Cheater's way...)


Ingredients
1 Large can of Veg-All (Drained)
1 container of Philadelphia Cooking Creme (Savory Garlic)
2 Deep dish pie crusts (thawed)
 1 Rotisserie Chicken


1. Pull apart the chicken and put into a pan. 
2. Add drained Veg-All and Cooking Creme.
3. Cook on Med-High until contents of pan are bubbling.


4. Pour chicken mixture into one deep dish pie crust.
5. Flop over the top crust. Pinch-seal edges. Cut venting slits into top crust.

I literally "flopped" it onto the pie...not pretty, eh?
6. Bake at 350 degrees for 35-40 minutes.
7. Let sit for 5 minutes before cutting into it.


8. Enjoy! (And savor in the delicious smell of your kitchen...yummy!) 
 
 
TastyTuesday200pix The Dirty Dozen vs. The Clean Fifteen

Friday, February 18, 2011

From Freezer to Table in 25 Minutes

Tonight's meal is one of my favorites. Has been since I was a kid.

It takes less than 25 minutes from freezer to table.

It tastes great.

Every one of the kiddos will eat it, hubby included. It's called...

S.O.S

What you will need:

2-2.5 punds of ground beef
1 can mushrooms (8 oz), drained
1 packet Au Jus Gravy
1 packet Brown Gravy
2-3 cups water
Steam and Mash Russet Potatoes


Milk
Salted Butter
(For the mashed potatoes)

1. Put the potatoes in the microwave according to directions (most are 10 min.)
2. Brown ground beef and drain.
3. Add mushrooms, Au jus and Brown gravy packets.
4. Add 2 - 3 cups water, depending on how thick you want the gravy.
5. Mix well.
6. Simmer on Low-Medium while you make the mashed potatoes.
7. Mash potatoes either according to package instructions or your own taste.
8. Serve SOS (meat mixture) over mashed potatoes.

Prior to mixing together.
 We generally serve this with early peas and a side salad.

It super simple and quick. Tastes fantastic, too.

The cooking goes by quickly because everything seems to line up time-wise. While the potatoes are cooking in the microwave, the beef is browning. While the mix is simmering, the potatoes are being beaten.

And...this makes your kitchen smell Ah-Maze-ing!!!

Bon Appetit!
**Side Note: The Steam and Mash potatoes are truly the BEST thing since sliced bread. They are REAL potatoes...the ingredients are "potatoes, water, some preservative". They taste just like boil and mash potatoes. Here's a picture of them after being steamed and before being mashed:

Monday, February 14, 2011

Dinner For 10 - For Less Than $20

For as long as I can remember, my family and I have tried to have Sunday night dinners together. Something about those chaotic, laughter-filled evenings seems to recharge you for the coming week (even if they are exhausting while they are happening!)

Tonight is my night to host. Eek!

We're on a budget. Double Eek!

There will be 5 adults and 5 children. Argh!

What will everyone eat, so that I only have to cook one meal...economically?

Solution: Slow Cooker Crock Pot Salsa Chicken!


Ingredients:

2 cans whole kernel yellow corn, drained (0.69 each)

2 can black beans, rinsed and drained (0.67 each)

2 cans Ro Tel tomatoes (Mild - for the little ones) ($1 each)

8-10 Frozen chicken breasts ($7.99 a bag for frozen breasts)

Bag of shredded Cheddar cheese ($5.99)

10 flour tortillas (0.99 bag of 10)

Total: $19.69
I did my shopping at Kroger on 2/13 (for price comparison)

Here's the easy part:

Put chicken in large crock pot.

Pour over corn, beans and tomatoes.

Cook on Low 4-6 hours.


Shred chicken prior to serving.

Serve chicken, corn, beans and tomatoes together in flour tortillas.

Sprinkle on cheese.

Yummy!

**Note: the Littlests and Little Miss will eat this, too. Little Miss will eat it wrapped in a burrito-style, but the Littlests will only eat the "insides" of the burrito. **

**If you use Mild Ro Tel and non spicy black beans, this dish is not spicy at all**

Posted and shared at: I heart naptime, The Shabby Nest, and Finding Fabulous

http://www.thethriftyhome.com

Saturday, February 5, 2011

DIY 'Nilla Wafers


So, after making our own Goldfish crackers, I started to look around the house at all the other foods my little ones eat in a light-speed fashion. (ie: I buy them on Monday and they are gone by Wednesday.) 'Nilla wafers. Every night the Littlests have one after bath and before bedtime. There's just something cozy about a "cookie" and milk before bed. Or, so I am projecting onto them! :)

Little Miss also likes these as a snack some afternoons, so, needless to say, we buy them a lot.

Have you ever read the ingredients list back there?

Can you pronounce everything?

They taste SO good, but it's kind of scary the amount preservatives that are in there. I'm not exactly a 'granola' mom, but...we don't need all those things when they are gone in two days!

Off to the kitchen Little Miss and I go!

Here's a recipe for DIY 'Nilla Wafers (Once again, I bet you have all of it already!):


1 stick of butter (softened)
1/2 cup white sugar
1 egg (large)
1 Tbsp Vanilla
1 1/4 cup all-purpose flour
1 tsp baking powder

1. Cream the butter and sugar together.
2. Add vanilla and egg. Mix well.
3. Mix in flour and baking soda.


Look at that precious little hand, that's my sous-chef!  :)

4. Line cookie sheets with parchment paper.

5. The dough formed is a little sticky, some say to spoon it onto the cookie sheet, I rolled it into little balls. (I also wanted that classic 'Nilla shape.)


6. Bake at 350 degrees for 7-10 minutes or until golden on the edges.


The Verdict: Me - I like them. They are a nice, light cookie that tastes GREAT with a glass of cold milk. I don't think they taste exactly like a 'Nilla wafer, but I'm okay with that.
Darling Hubby - "They taste like fluffier sugar cookies. I like them." He ate about 15.
Little Miss - "Mommy, these 'Nilla wafers are delicious!" She ate 5.
The Littlests -  The Littlest Littlest ate 2. Seemed just fine with the taste, texture, etc. The Biggest Littlest fed his to the dog. Not because he didn't like it...he didn't even taste it. He's the pickiest.

So...I would call it a success! Not quite 'Nilla, but not too shabby!

Friday, February 4, 2011

Easy Middle of the Week Dinner - Ham and Cheese Casserole


What you need:

6-8 slices of ham (We used Hormel Natural Honey Baked Ham)
4-6 servings of white rice (Instant is fine...) - already cooked
8oz Velveeta cheese

1. Preheat oven to 350 degrees.
2. Dice ham.
3. Dice Velveeta.
4. Combine ham, cheese and rice in casserole dish.
5. Cook 25-30 min, or until warm throughout.
6. Serve with a side of veggies - we usually do broccoli.

That's all there is to it. AND...2 out of three of the little ones in this house L.O.V.E. it. And, their parents do too!

**Special sidenote: I found the cutest kids' casserole dish at Michael's the other day. It's dishwasher and oven safe, too! Little Miss ate her meal all by herself when I served it to her in this!**


Oh, I should mention, I did NOT cook Little Miss's casserole in her dish, that would make the dish too hot to eat out of, defeating the purpose of the dish.

Thursday, February 3, 2011

Valentine's Day Bark

Candy. Everywhere. A benefit of Valentine's Day.

Yummy!

Little Miss and I decided while the Littelests were napping today that we would make some Valentine's Day bark.

We used:

1 bag Wilton's Melting Chocolate (white)
1 bag Dollar Tree Valentine's Lollipops
Cookie sheet


1. Take all the lollipop sticks and wrappers off the hard candies.

2. Put hard candies in a big Zip-loc baggie.


3. Smash candies into bite-sized (we made them smaller) bits. Put aside.


4. Put Wilton's melting chocolate in a microwave safe bowl.


5. Microwave until smooth and creamy in 30 second intervals. It took about 75 seconds in our microwave.

6. Pour melted chocolate onto cookie sheet and smooth with the back of a spoon.

7. Sprinkle hard candy bits on top. Little Miss became a pro at this.


8. Lick spoon.

9. Allow chocolate time to cool.

10. Break into bark-like bits.

11. Enjoy!


Thursday, January 27, 2011

Make Your Own Goldfish Crackers - A Tutorial

Goldfish crackers and toddlers seem to go hand and hand. We have Goldfish remnants, dust and smears in every room of our home on any given day. We buy them...by the caseload.

So today, I decided to try and make our own...what's wrong with me? ;) Maybe don't answer that...

I made the dough in the morning while the Littlests and Miss Priss were playing. Mostly...at some times, a little boy or two was holding onto to my leg and crooning love songs to me...


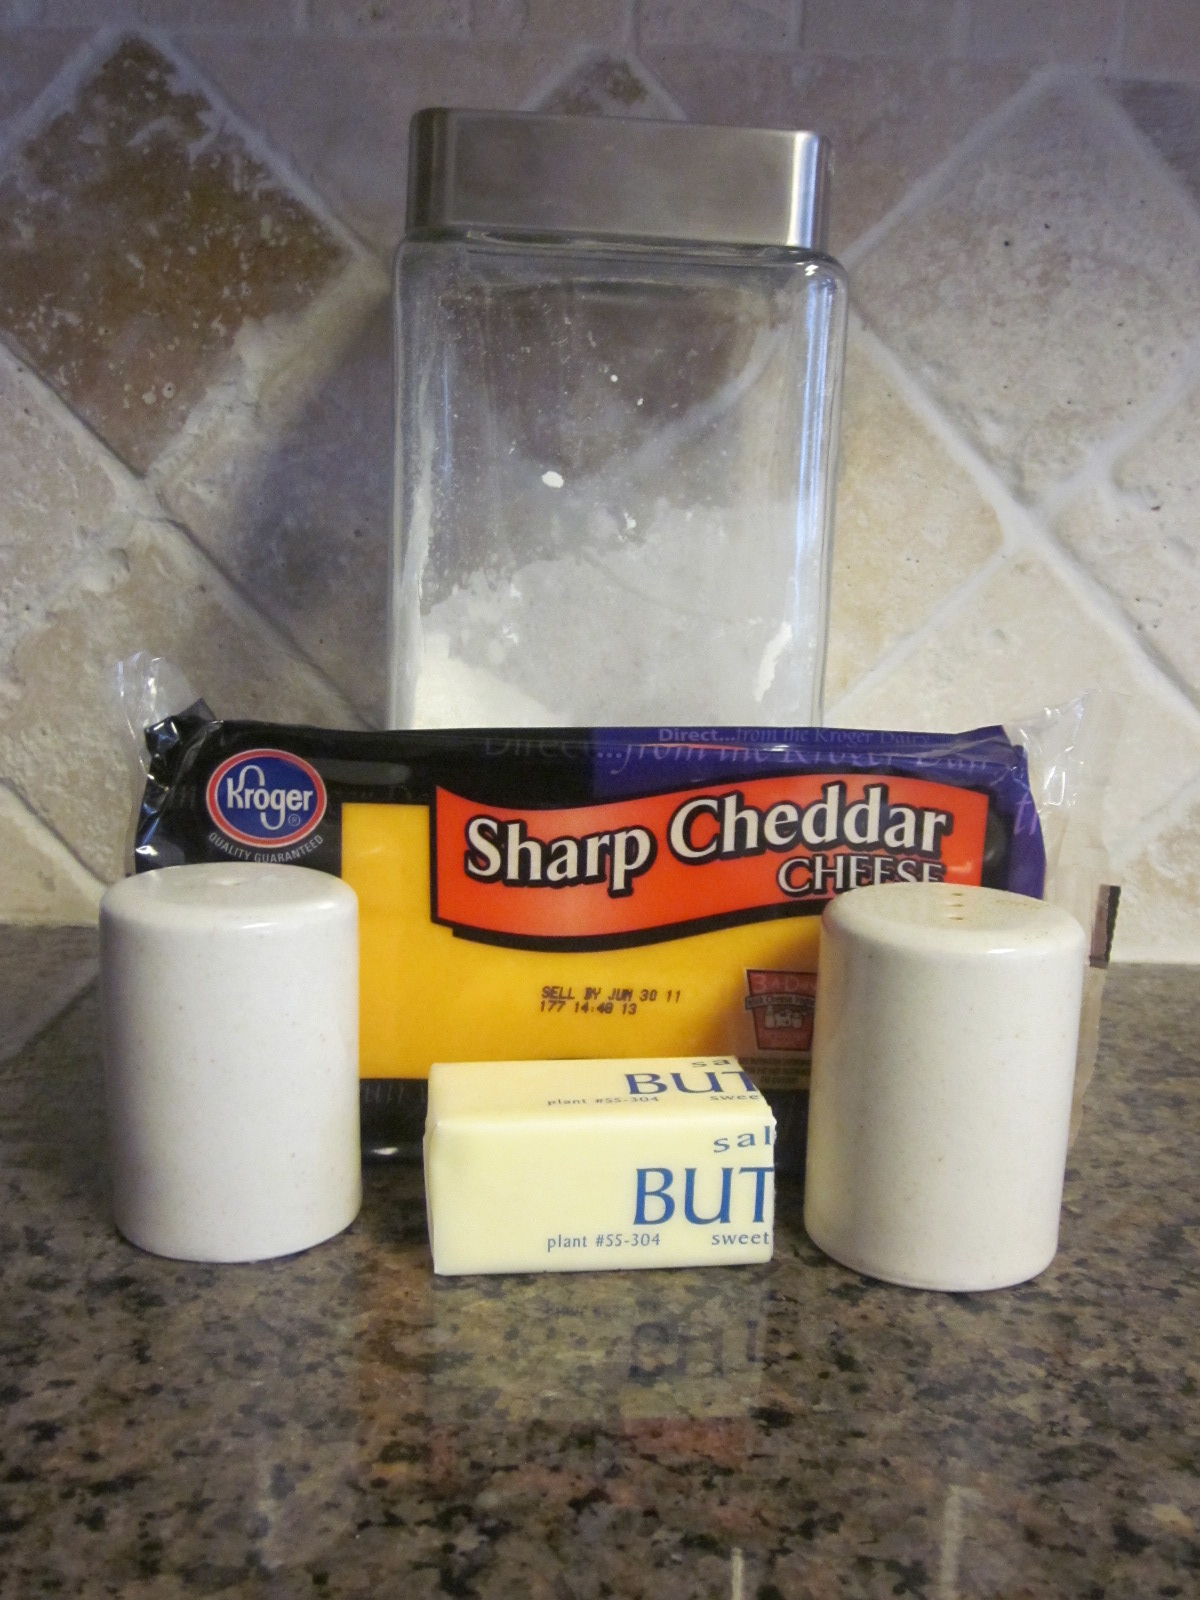
Here's the recipe (I'll bet you have everything you need already~):


  • 1 C all-purpose flour


  • 4 T cold unsalted butter, cut into small pieces


  • 8 oz cheddar cheese (I used sharp Cheddar, but I think you could use any type your little ones prefer)


  • 1/2 t salt


  • 1/2 t fresh-ground pepper


  • I found the recipe from the cupcake project.

    1. Combine all ingredients into a food processor.

    2. Pulse until you get a grainy mixture, like a cornmeal.

    3. Add 3-4 Tablespoons of water at a time, until the mix forms into a doughy ball. (I used 3 Tbsp).

    4. Form the dough into a ball or log and wrap in plastic wrap.

    5. Put in the fridge anywhere from 20 minutes to 24 hours. (Mine stayed in for 3 hours...until the Littlests went down for a nap and Miss Priss and I were alone to cut out shapes. She LOVES to cook!)

    6. Line cookie sheets with parchment  paper.

    7. Roll dough until it is 1/8 inch thick. (The thicker the dough, the less crispy the crackers are.)
    8. Cut out as many crackers as you can.

    ...Using tiny Christmas cookie cutters...
    9. Space them 1 inch apart on cookie sheets.

    10. Bake at 350 degrees until golden-crisp. (15-20 minutes)
    
    Look how puffy they get!
    

    VERDICT: The kids love them! (Although Miss Priss said, "Now can I have the real Goldfish?") And...I like them even more than Goldfish *Blush*. They are crispy on the outside and a little softer on the inside than the original. Will definitely be making these again!

    Will you try them? Let me know what you think!
    giveaways

    Monday, January 17, 2011

    Hamburger Stew - Easy for a Cold Night


    Today is a recipe from my mother, the smell of the stew cooking always makes me feel safe and at home. I hope my children will have the same reaction when they get older. It's an easy recipe for a mom (or dad) to prepare, and the kids will actually eat it! (Yea for bonuses!!)

    Hamburger Stew

    2 cans Veg All
    1 small can Tomato paste
    1 large can Beef Broth (14 oz or more)
    1-2 pounds ground beef (browned and drained)

    Mix all the above ingredients together and bring to a slow boil. Turn heat down to simmer and cook 20 minutes more.

    Your tastes might call for a more "soupy" stew, so you may add as much beef broth as you would like. With the above mix, it's a thick stew.

    **A note for Slow Cookers**
    Yes, you can cook this in a slow cooker. Just combine all ingredients (with the meat already cooked and drained) in the crockpot. Cook on Low for 2-3 hours or HIGH for 1-2.

    We serve ours with Texas Toast or cheese toast. So yummy!

    Tuesday, January 11, 2011

    Pot Roast with a little help


    Snow Day 2


    I love a good "home style" dinner when the weather is cold and all you want to do is hunker down and cuddle with a good book. Or, in reality, chase three overly bored children through the house as they discover what makes the loudest noise when it crashes.

    Back to the kitchen...

    Post roast with a little help, from McCormick's!

    Super simple, cheater's recipe and I'll let you know what the troops say tonight!

    McCormick's Pot Roast

    2.5 - 3lb round roast

    1 small bag of baby carrots

    1 can of whole white potatoes (told you it was cheating!)

    1 packet of McCormick's Savory Pot Roast mix

    1 cup water

    Crockpot on LOW for 8-10 or HIGH for 4-6
    Because I got a late(ish) start, I zapped it on HIGH for 1 hour, then LOW for 7 hours.


    Prior to cooking (Look at all that seasoning!)


    ____________________________________________________________________


    The Verdict:

    The littlest(s) hands loaded up their mouths non-stop with the meat. Victory! One liked the veggies, too, the other...not so much. But the meat, four helpings for each!

    > Yummy!


    The big one, well, she really liked it when I fed her the pieces of meat while cutting it up for the kids' plates. She even ate the potatoes while cutting them. Sitting down to eat was another story. None. Not one bite. Think it's a three year old thing...

    My darling hubby said, "This is really good, Pook!" -- Gotta love those glamorous nicknames. "Put it in the rotation."

    And, me...I like it! It was easy, tastes good and my kids eat it....at least, when they don't realize it's actually *GASP* dinner!