Monday, March 28, 2011

Simple Mantel Decorations

I love the way boxwood topiaries look on a mantel.

I can't find fake ones that look real enough...

So, I made my own "topiaries" from dried flowers, that were already in the shape of a ball. Colors are simple for our mantel this spring. Understated. Boring?

Not sure yet. The jury is still out.

The den, where the mantel is, is a 'sanctuary' of sorts when the kiddos go to sleep. It's where the Mister and I get to have our adult conversations. It's where we try and relax.

I need opinions.

What do you think?


Tuesday, March 22, 2011

Yummy Strawberry Syrup

So...

The kids are having a hard time with the homemade yogurt.

They won't eat it anymore.

...But I LOVE it! I am saving so much $$ making it, but it's not worth it if the kids won't eat it, right?

I have discovered a Strawberry Syrup Recipe from Our Best Bites (which is an amazing blog and now cookbook, by the way!)

The Strawberry Syrup is AWESOME in the yogurt. And...mix it with granola?!? Shut the front door! It makes my mouth water!

:)

And...it's SO easy!

Strawberry Syrup

1 pint of strawberries (green cut out)
1/3 cup white sugar
Splash of Lemon Juice (I used the bottled kind)


1. Simmer your strawberries (you don't have to add any water) until they get a little soft and strawberry juice is created.


2. Dump the strawberries in a blender/cuisinart.
3. Add sugar and lemon juice.
4. Blend until your desired texture is achieved. I made mine into a puree this time around.
5. Eat your weight in whatever it is you use this on!


Some ideas for this sauce:

Homemade Yogurt
Waffles
Ice Cream
Strawberry Shortcake
Smoothies
Cheesecake
Just swim in the glorious goodness...

Enjoy! And, let me know what you think!

Friday, March 18, 2011

Tips for Simplifying/De-Cluttering

Some of you, my dear friends, have expressed to me concern about how to even begin the Simplifying Process. I know that it can seem overwhelming...how can you even find the time with little ones/husbands/work on your mind, on your leg, in your arms all the time? Believe me, I know and feel your worries and furstrations. I've been thinking up some "pointers", and here they are!

  • Little by Little - Simplifying doesn't have to be done all at once! Start in small intervals and small goals. 10 minutes at a time will make a big dent in the clutter.
  •  
  • Remember, more likely than not, it's going to look MUCH worse before it gets better. Keep pushing through!
  •  
  • Take care of yourself. If you feel overwhelmed during this challenge, step back. The entire goal of this challenge is to make your life simpler, easier, more enjoyable. Keep the big picture in mind.
  •  
  • When deciding about whether to keep something, ask yourself simple questions:  Will it/does it make life easier/better? Will I feel incredible guilt if I give it away? Do I feel good when I wear it? Do I feel good when I see this in my home? Is this a good representation of myself/my family/my home?
  •  
  • Break up the projects into smaller ones. If de-cluttering the "kitchen" makes you feel faint, change the way you attack it. De-Clutter the tupperware one day, the pantry the next, the refrigerator the third day, etc. There is no time limit to simplifying...
  •  
  • Remember to play. You are human. You need a rest and your family, partner and pets need you, too. Take breaks, go outside, have family night. Try not to let it consume you...although, when you get on a roll, it's hard not too!
Now, take a deep breath, go outside, give someone you love a kiss and remember how much better/easier your life is going to be after this simpl,ifying is over. I know you can do it.

Small time increments.
Small goals.
Small areas.

Keep it simple!

Thursday, March 17, 2011

A New Baby...of the Plastic Kind

Since we are trying to pare down in our lives, the Mister and I are also trying to pare down on the kids' toys, too. This calls for Mommy (me) - mostly - to creatively and stealth-ily get rid of some of the toys the kids no longer use.

My newest strategy may seem counter-productive at first, but it has helped us to donate 12 stuffed animals already...and we all know how stuffed animals have a magical ability to reproduce and multiply, right?

Little Miss is able to pick out a new dolly if she has had a good week of listening, following directions and being kind to others. This is the third week she has hit her goal. We went to the store yesterday to get her "new baby".

There are some ground rules for this new baby:
1. It cannot be more than $10
2. It cannot be a stuffy, fluffy, poofy animal
And...most importanly...
3. Little Miss must get rid of at least 2 stuffed animals in order to bring the new baby home.

Yesterday, she was able to find 4 stuffies that she could give up easily!

In exchange...I now have to look into these eyes every day.


...Her name is Belle...

And she frightens me a little.

;)

Wednesday, March 16, 2011

China Cabinet Facelift

I have never painted a piece of furniture.

Never.

I have always envied those who have the guts, the gall, the bravado to try to paint furniture.

I am now one of "those" people!

And the greated part of it is, I DIDN'T RUIN THE FURNITURE!

Let's start this "mock-tutorial" with a before shot:


This china cabinet, along with a table and six chairs, was generously given to the Mr. and I shortly after we were married. It's never really been our style, per se, but there has been a lot of bread broken with friends and family over this table.

I found a fantastic, inspring tutorial Here (By the way, LOVE her blog!)

Here is the tutorial step-by-step:

1. Breathe deeply. You CAN do this!

2. Head to Sherwin Williams and get:

Sherwin Williams Oil Enamel in Satin Finish in your color (1 qt was enough for this piece - 3 coats). Enamel is the key word here. Apparently, you can do latex paint, as well, if you get enamel finish. I wasn't taking any chances, so I used oil enamel.


Medium grade sandpaper and a sander just like the picture above. Don't get a soft sander. This will be to distress your finished product.

Buy a GOOD paintbrush. I spent about $15 for a specifically "oil" paintbrush.

Mineral Spirits (to get the paint off).

Plastic covering for the floor.

Minwax Polyurethane - oil based. This is optional. I did not use it for this china cabinet, but I will for the tabletop. I think it will help with the wear and tear of the tabletop.

3. Set your plastic covering on the floor, under the furniture.

4. Lightly sand the furniture. Just enough to get the sheen off - this gives the paint something to "stick to".

5. Open a window. Oil based paint stinks, and lingers. Having the windows opened, listening to the outside noises of spring really helped make me in a good mood...maybe it was the paint fumes? :)

6. Here's where my experience and the Clover Lane tutorial differs: Brush on a thin coat of paint. If I tried to go too thick, it looked AWFUL. I ended up doing three very thin coats. Part of it could be that I used an antique white color over wood grain. I was so nervous about painting furniture that I didn't want to take any chances...so, three coats it is!


These photos were taken after the first coat. This is also when the Mister saw it for the first time...and HATED it. Gah! That's not good!

And...yes...I forgot to unload the inside of the cabinet...I wasn't painting in there yet, so I neglected to empty its contents. Hee hee...not exactly a professional painter, am I?

After the third coat of paint, the piece looks amazing. I am very proud of myself, I did it!

Here she is, in all her glory...


Oh...and now the hubby LOVES it! (Whew!) He said that it's "so much better than I thought it was going to be". Vote of confindence for me? Not so much...but I have now proven myself and he is gaining confidence in my abilities, too! :)

Now...

I need some advice.

What should I do with the inside of the cabinet?

Should I paint it? Paint it another color (there is no lighting)?
Put up beadboard on the back?
Leave it alone?

Should I distress the edges?

Help me, please, you wonderful, talented readers!

:)

Tuesday, March 15, 2011

Master Bath De-Clutter (Under the Sink)

Yesterday was cleaning under the Master Bathroom's sink and my dear hubby's closet. His clean-out took no time at all...what a neatie he is! (I could aspire to be him...would that be weird?)

Anyhoo...

My "under the sink" area was a mess. And...Maxi pads were the fore-front star. Please excuse their cameo in this Before photo! ;)


I went to Target to get some canvas tapered storage boxes (2 small, 2 large) so that I could get rid of my plastic shoe box storage system that wasn't working for me. A little shifting and a little of throwing away things I would never/had never used and...


The Maxis are no longer the star of the show! 


I'm thinking I might even get some shelf-lining paper eventually...ya know...to make it a little "prettier"!

Today/Tonight's goal is to clean out the kids rooms.

This will be a feat...they're always underfoot when you clean their rooms, so you have to be a little stealth about it...

Let me know, how are you doing with the "Purge"?

Monday, March 14, 2011

Making Homemade Yogurt Thicker -- The Easy Way

All right, since I finally figured out to make yogurt, I thought I would try my hand at making it "thicker" this go round.

(Here's a link to the original yogurt post (with ingredients): Crock Pot Yogurt
I bought some cheesecloth. I poured the yogurt through it...I failed.
...Miserably...

I was frustrated.

I found coffee filters!

I layered three in a colander and then put the colander in a bowl.


Then I put it all in the refrigerator and let it sit for about 1 hour.

It worked! It's thicker!

The longer you let it sit, the thicker it will get. You can even make Greek-style yogurt this way.

And...the "liquid" you have left over is whey.


You can use it in place of buttermilk for recipies, I'm told. (I don't really use buttermilk a lot, though).

So, there you have it! Thicker, yummier, cheaper, yogurt!

Aren't you proud of yourself?

:)

Sunday, March 13, 2011

Sunday Night Check In...

Over the weekend, did you do any de-cluttering or did you relax?

It was GORGEOUS here this weekend! We played outside A LOT, had family over for a dinner, did a little painting (my first time painting furniture, stayed turned for that!), and did *some* de-cluttering.

I cleaned out my dresser. Emptied two whole drawers! 2 bags to donate from this part of the challenge. Not too shabby. Tomorrow (Monday night, hubby's closet is fair game - good thing he's the neat one of the family...shouldn't take too long).

On Friday, we made our very own pizza for pizza-night. It was so much fun! And...everyone loved it! I do believe it will become a new tradition...and, it was inexpensive and easy. I will talk you through it soon!


On Saturday, we got the flower girl dress for our dear friends' wedding in May. Little Miss is going to look absolutely darling! Or, if you take her word for it...GORGEOUS! I can't believe my little lady is getting so big!


That's the weekend in a nutshell for us!

Ooh...I'm also making more yogurt right now...going to use the cheese cloth on this one to make it a little thicker. I'll let you know how it turns out!

Back to the challenge tomorrow!

Hubby's closet and the Master Bathroom is on the slate for Monday!

Toodles!

Thursday, March 10, 2011

Closet Cleaning (aka: Good-bye 1995!)

Whew...

These past three days have been a whirlwind!

There have been several trips down memory lane as I have gone through my clothes...did I really have clothes that are more than 15 years old? Yep...how cool does that make me?

Here's how I "ran" my clean-out:

Each naptime, before Little Miss and I shared time, I dug into the closet for 15 minutes. I pulled straight from the rack and anything that was either a) older than my marriage (7 years) or b) faded beyond belief was g.o.n.e.

Then, when my 15 minutes were up, I took a section out of the closet at a time and laid them on my bed. In the middle of it. So I couldn't sleep without going through it.

Brilliant.

Then, after the kiddos were dreaming of sugarplums or ice cream, I would not allow myself to take a shower until the bed was cleared off.

The "rule" I used was: If I didn't wear it the last season, it was gone (unless it was a special dress, etc).


How cruel am I?

But...after 3 nights, here it is:

Before: Right Side of the Closet                                         After: Whoa!                              
                
Left Side of the Closet After
(Not too sure where the before is....)

The Grand Total
6 Bags to Donate!
(And 1 to junk!)


I now have about 2/3 the amount of clothing I had before, maybe less. It's a little unsettling...
It's also a little free-ing!

I also realized, through this journey, that I have an unhealthy love affair with turtlenecks. It's kind of like Diane Keaton in "Something's Gotta Give"...I guess they're my thing! ;)

My dear, sweet, "just like me - only cooler" friend and I were talking this afternoon and came up with a thought to get us through this purging:

I would rather have 5 outfits I could really strut my stuff in and look/feel great than 100 that make me feel "meh".

So...how did you do? How many bags is your closet?


Chic on a Shoestring Decorating

Wednesday, March 9, 2011

A Year in Photos - How I Keep Our Memories

Before I had children, I was the worst when it came to actually taking photos and storing them in "pretty" places such as albums, frames, etc.

Now that children have entered the picture ..(get it?)..I have over 200 photos a month to find something to do with. Each is precious, each is a special memory and I would love to keep each within reaching distance if I were to want to see a specific birthday, Christmas, event, etc.

With that many photos, traditional albums get pretty pricey, not to mention the amount of space that would take up. I don't have that much room to spare!

I now make my own photo books for every year!

It's a great tradition at the beginning of the year, to load all the pictures into an album on a photo sharing site (I use Snapfish.com). It takes almost no time at all, as I have already uploaded the pictures to the site as the year has passed.

I generally select a fairly simple 5x7 Everyday Book. Boring Black cover...it works.

The first page always says the year.

The photos are then randomly placed, in order of the months, into pages and pages of beautiful memories.

There are almost always codes that help to save a TON of $$ on these books - especially in the end or very beginning of the year.

Even without a code, they run about $60...which isn't cheap, but saves a lot when you think of how much it would have cost to print each of those pictures out individually and put them in albums...and then buying a bigger house to fit all the albums in! ;)

...And, the great thing is...when the grandparents saw what I was doing, they said they wanted one, too! Christmas Present checked off the list!

:)

How do you keep your memories?

Organizing Mission Monday

Tuesday, March 8, 2011

40 Days...Where Do We Start?

All right, my brave friends...let's get a little list going here so we know where we are going to simplify (and get rid of LOTS of stuff!)

1. Your closet
2. Your dresser
3. Your partner's closet/dresser
4. Your children's rooms
5. Master Bathroom
6. Guest Bathroom
7. Linen Closet
8. Coat/Hall Closet
9. Kitchen
10. Den/TV/Rec Room
11. Dining Room
12. Garage
13. Car
14. Kids' Toys/Playroom
15. Outside
16. Attic
17. Basement (if you've got it)

Some of these places will take a little longer than others...we'll go through it together.

Tomorrow, Wednesday, we will start with number 1. Your Closet. My Closet. I am fearful. This might be the toughest one on the list, so we will be devoting 3 days to it. Wednesday through Friday.

Don't forget to take pictures of before and after...and of all those bags you will have!

Can't wait to see it!

...Simplify...(and a Challenge)

Simplify...

This seems to be the new "Hot" word in Blogland right now. Maybe it's just the blogs I frequent...maybe I notice it because it is what I crave.

I am working to simplify my life.
To try and escape the undue pressures I put on both myself and my sweet husband.
To relish in the beautiful life we are in.
To marvel at the tiny lives which we held a small part in creating.
To be thankful for all that we have.
For all that we are...


When I was younger, life seemed so simple, so easy. My parents were devoted to my siblings and myself. My bedroom sat as a place where I could be me, it was a safe haven. And, on those days when alone-time just wasn't cutting it, my parents' laps provided me with unquestioning love and comfort.

The Cosby Show, Family Ties and Full House were on television. Problems were always solved within thirty minutes on those shows. In fact, all my "little girl" problems seemed as though they could be solved just as easily.

I didn't pay any attention to the brand jeans I was wearing or what my parents were driving. My best friends had good hearts, good souls and questionable fashion sense. I never noticed...until I became an adult and looked back at pictures! :)

I always had enough.
I felt safe.
I was humble.
I was loved.
I loved.

I am trying to get back to that place.

I want my children to be children. To play with dolls and cars and not worry about what if's. That's my job, their father's job.

I want my children's memories of childhood to be about the time their parents spent with them, the silly things, the little things, the quirky habits and the laughter we all share.

This year, I am simplifying life. I am going through every.single.thing in this house and I am deciding right then and there if it will make life "better" for my children and my family. If not...to the donation pile it goes!

I heard of an idea on the internet about 40 days to get rid of the extra things in your life. It was by a blogger, when I find her again, I will link to her...

Starting Ash Wednesday (this Wednesday), there will be 40 days (how long the Lenten season is) of purging and simplifying. My goal is to have 40 trash bags of donation-worthy things by Easter.

I will be coming up with a list of places to simplify for this challenge and will link up soon...

Won't you join me for
40 Days to Simplify?

Sunday, March 6, 2011

Spring Flowers - A Cheap Tutorial

First, let me confess my, like many-a-mother's, addiction to Target. AND their Dollar Spot!

We were there this morning and I saw these mixing bowls:


Don't they look like flowers? So cute!

Spring is right around the corner...so is Easter. These colors scream Easter and Springtime to me. I'm going to make some lovely flowers to hang on our Playroom wall!


Knowing that the paint would be super-easy to peel off when I'm ready to take the flowers down, I chose Tempera Paint. If you wanted these to be permanent flowers, you would want to use different paints and scuff up the inside of the bowls, too.


Pour Tempera paint into bowls.

I tapped and rotated the bowls so that the paint would spread into the grooves...not exact and not always pretty, but I wanted them to look at home in the Playroom.


Let the paint dry. It's on plastic, so it takes a L..O..N..G time! (Over 24 hours)

I "Jimmy-Rigged" the backs so that I can see how they hang on the wall. I will have to decide on more long-lasting ideas when I decide if this wall is their "forever home".


I also changed my mind about the different colored centers. I think I like them better yellow.

So...inexpensive and cute!


Friday, March 4, 2011

Stain Removal Cheat Sheets (Links Fixed!)

Spring is almost here (Yippee!), and we've already been playing outside every day for the past two weeks. This has increased my laundry two-fold...is that even possible? And, it has required a re-newed interest in stain removal expertise.

I have two handy Stain Removal "Cheat Sheets" that I keep posted in my laundry room. I can't tell you how many times I have used them...and saved the kids' clothes.

The first is from the queen of domesticity, Martha Stewart:


The second, I copied years ago from Good Housekeeping.


Not that I need ANY help with stains!
Ha ha!


Happy Friday!

Linking with:

Tuesday, March 1, 2011

What I've Been Doing...

Kitchen Organizing!

Here are some before and after shots for your entertainment. While I sit for a second and drink this lemonade...then, it's off to play with Little Miss while the Littlests sleep.

Busy Day!

 Kitchen Countertop...Before


Kitchen Countertop...After.

Then, I started on a little cleaning of the glasstop stove. I used my ever-ready Scour Off Paste again. And...


Before

After
Now, onto the kitchen island's drawers, which have become the "junk drawer", towel drawer and napkin drawer.
 Before and after of the napkin/clips drawer.


Before and After of the junk drawer.
One thing to note: this drawer hid approximately 7,248 pens...if you've lost one, chances are, it was in here!

 Before and After towel drawer.
I have found that rolling the towels saves A LOT of space.

 Before and after: top of the kitchen island...where EVERYTHING seems to collect.

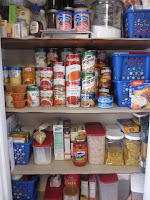
And...finally, the pantry. I don't have any good before pictures,
but here are some pics of where we are now...we've come a long way!


Now, it's your turn.

What did you do today?


Organizing Mission Monday